
| Driving Lessons In Irvine. | |
| Manual Driving Lessons. | |
| Contact Choices | |
| Mobile : | 07773 979907 |
| Email : | Dave |
| Online : | Lesson Enquiry Form |
| Facebook : | |
| Twitter : |  |
| Review : | Post Your Driving Lessons Review On Google |
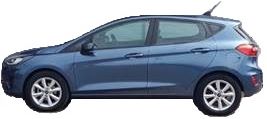
Driving School Car
Fiesta EcoBoost Trend
Mark Novak of Drybridge, Driving Lesson Testimonial
From the first lesson with Dave I felt thoroughly at ease. Dave was very relaxed and pleasant, which helped greatly in reducing any stress. I passed my test with very few lessons, and this was down to the great instructor, and relaxed and enjoyable experience. Thanks to Dave at Glencor.
From the first lesson with Dave I felt thoroughly at ease. Dave was very relaxed and pleasant, which helped greatly in reducing any stress. I passed my test with very few lessons, and this was down to the great instructor, and relaxed and enjoyable experience. Thanks to Dave at Glencor.
The Fiesta EcoBoost Trend Driving School Car.
- A very smooth clutch to ease moving off,
- Height adjustable drivers seat - Wide range of adjustment,
- Height adjustable steering wheel - Easy to position to suit your seat height,
- Electric Power Assist Steering (EPAS) - Making steering during manoeuvres easier,
- Air conditioning - Cool inside no matter what the weather,
- Very smooth suspension - Drive in comfort and forget the bumps,
- Electronic stability control - Helps to reduce loss of traction with the road,
- Anti-Lock Braking System (ABS) - Dramatically reduces the risk of skidding while braking,
- Electric door mirrors - get that perfect view,
- Easy gear change - Change with confidence,
- And more.
Caitlin Maclean of Girdle Toll, Driving Lesson Testimonial
I would like to wholeheartedly thank Dave for securing me a ZERO FAULTS pass. My examiner complimented my relaxed driving style which was completely down to being taught in that style. I highly recommend Dave of Glencor for lessons as he gave me the confidence to achieve an excellent pass first time round. Thank you so much Dave.
I would like to wholeheartedly thank Dave for securing me a ZERO FAULTS pass. My examiner complimented my relaxed driving style which was completely down to being taught in that style. I highly recommend Dave of Glencor for lessons as he gave me the confidence to achieve an excellent pass first time round. Thank you so much Dave.
Familiarise Yourself With The Driving School Car Controls
- Spend more of your driving lesson time practising driving rather than being parked up at the side of the road. Before your first driving lesson, familiarise yourself with the driving school car controls by reading the Show & Tell Q&A section of the driving test.
- You don't need to fully understand all the controls at this stage. As your driving school instructor, I will always assist with your understanding of the controls.
A Backup (Second) Fiesta Driving School Car.

Glencor driving school has a second Fiesta car.
This is available should the main car be temporarily off the road for servicing or any other reason.
Having a backup car has enabled learners to continue with uninterrupted driving lessons. More critically, having a backup car has enabled learners to continue with the driving test and to pass.
Terms and Conditions
Privacy Policy